Quick Guide to Start Monetizing with PubPower

Brian Wilson
Last Update il y a 2 ans
Welcome to PubPower! If you're new to our platform and eager to start monetizing your website, this quick guide will walk you through the process in 8 simple steps. Ensure you have some technical skills under your belt, or don't hesitate to reach out to your PubPower Account Manager for assistance.
Step 1: Sign up for PubPower
Visit our registration link here to create your PubPower account.
Step 2: Add your domain
1. Navigate to the control board on the left-hand side and select SETUP -> Supply.
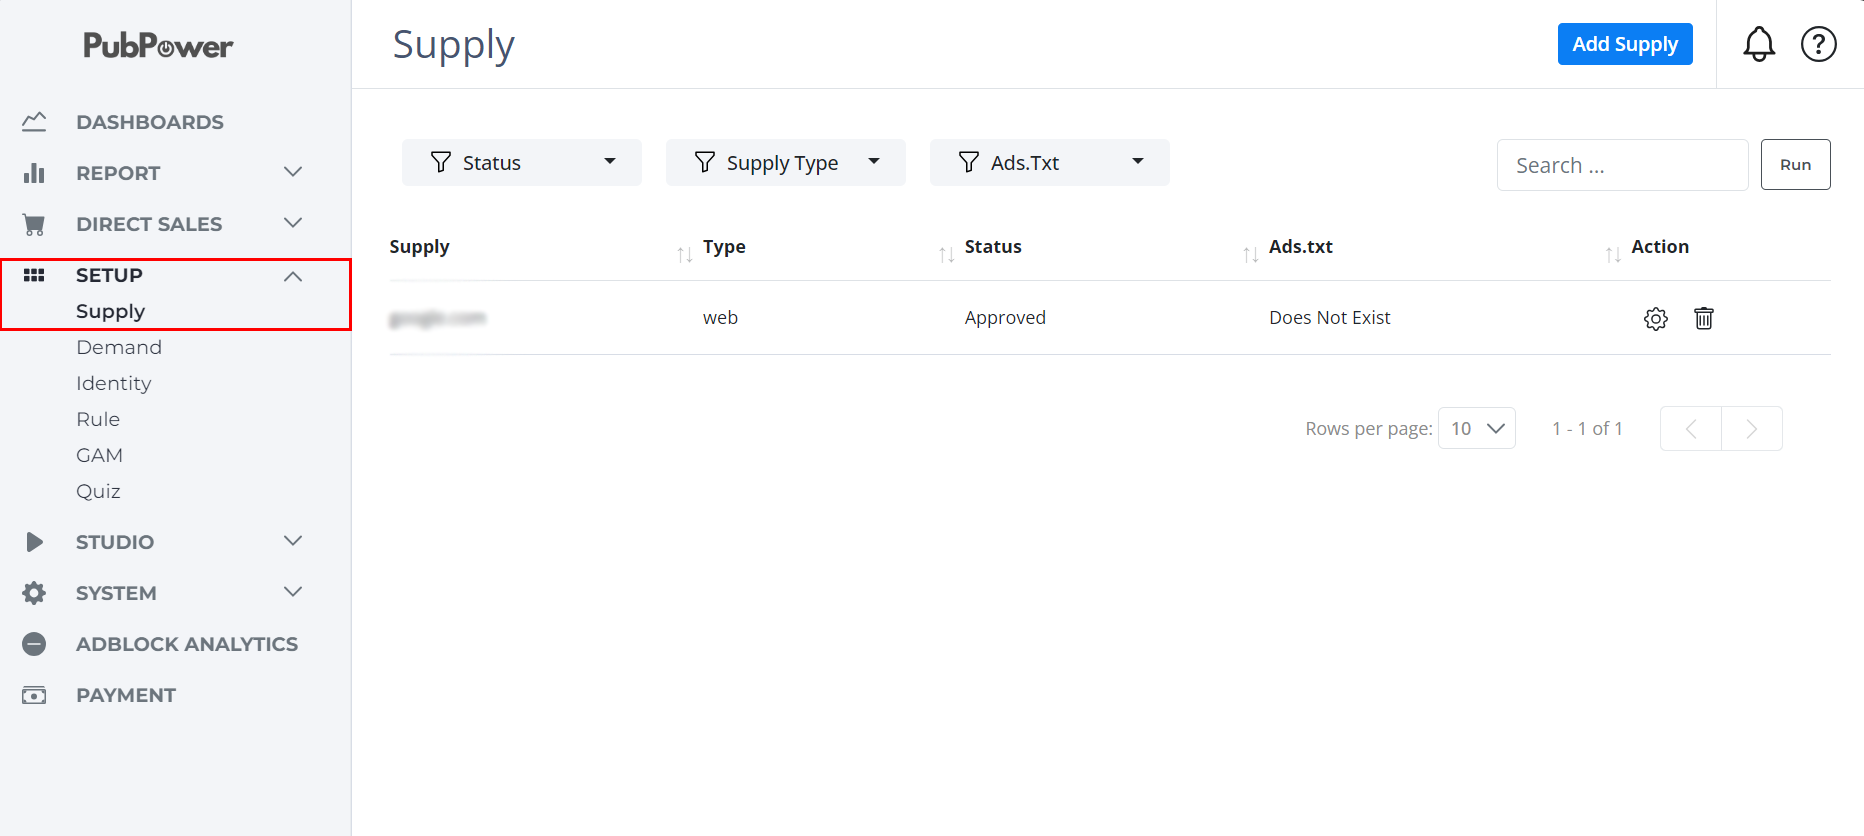
3. Choose Supply Type, enter your domain name, and click "Submit".
Your domain will be pending for our QA team to check if your websites meet our website requirements, content policy.
Note: Your domain will undergo a review process by our QA team, typically taking 24-48 hours for approval. For expedited approval, reach out to the Publisher Support Center.
Step 3: Host PubPower Ads.txt Lines
- Click the SETUP icon on your domain
2. Go to ADS.TXT section
3. Copy all the lines in the box and Paste them in your ads.txt file
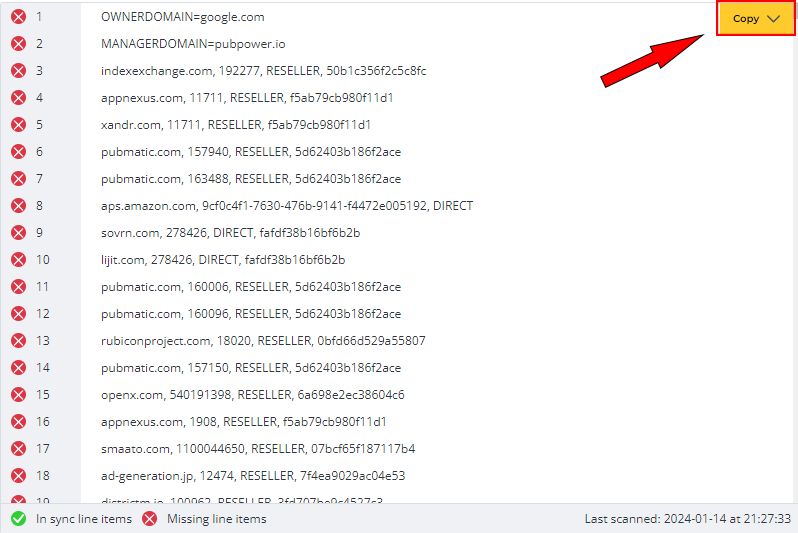
In case you don't have one, please go to this creating ads.txt file instruction
Step 4: Create a New Ad Tag
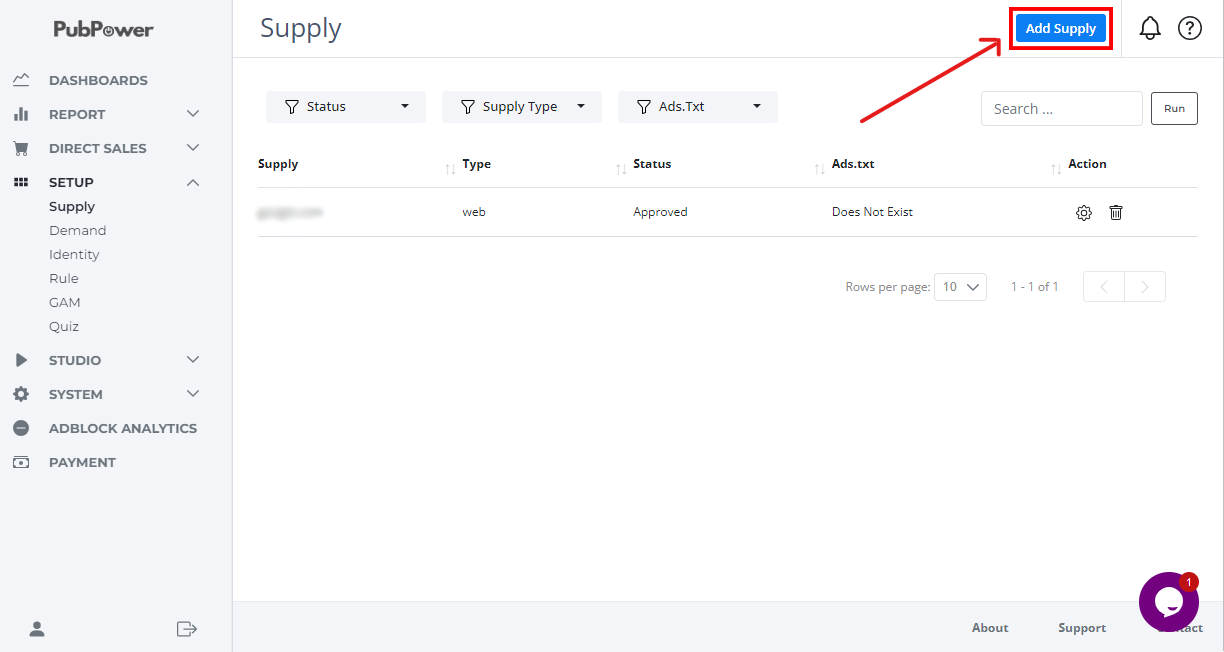
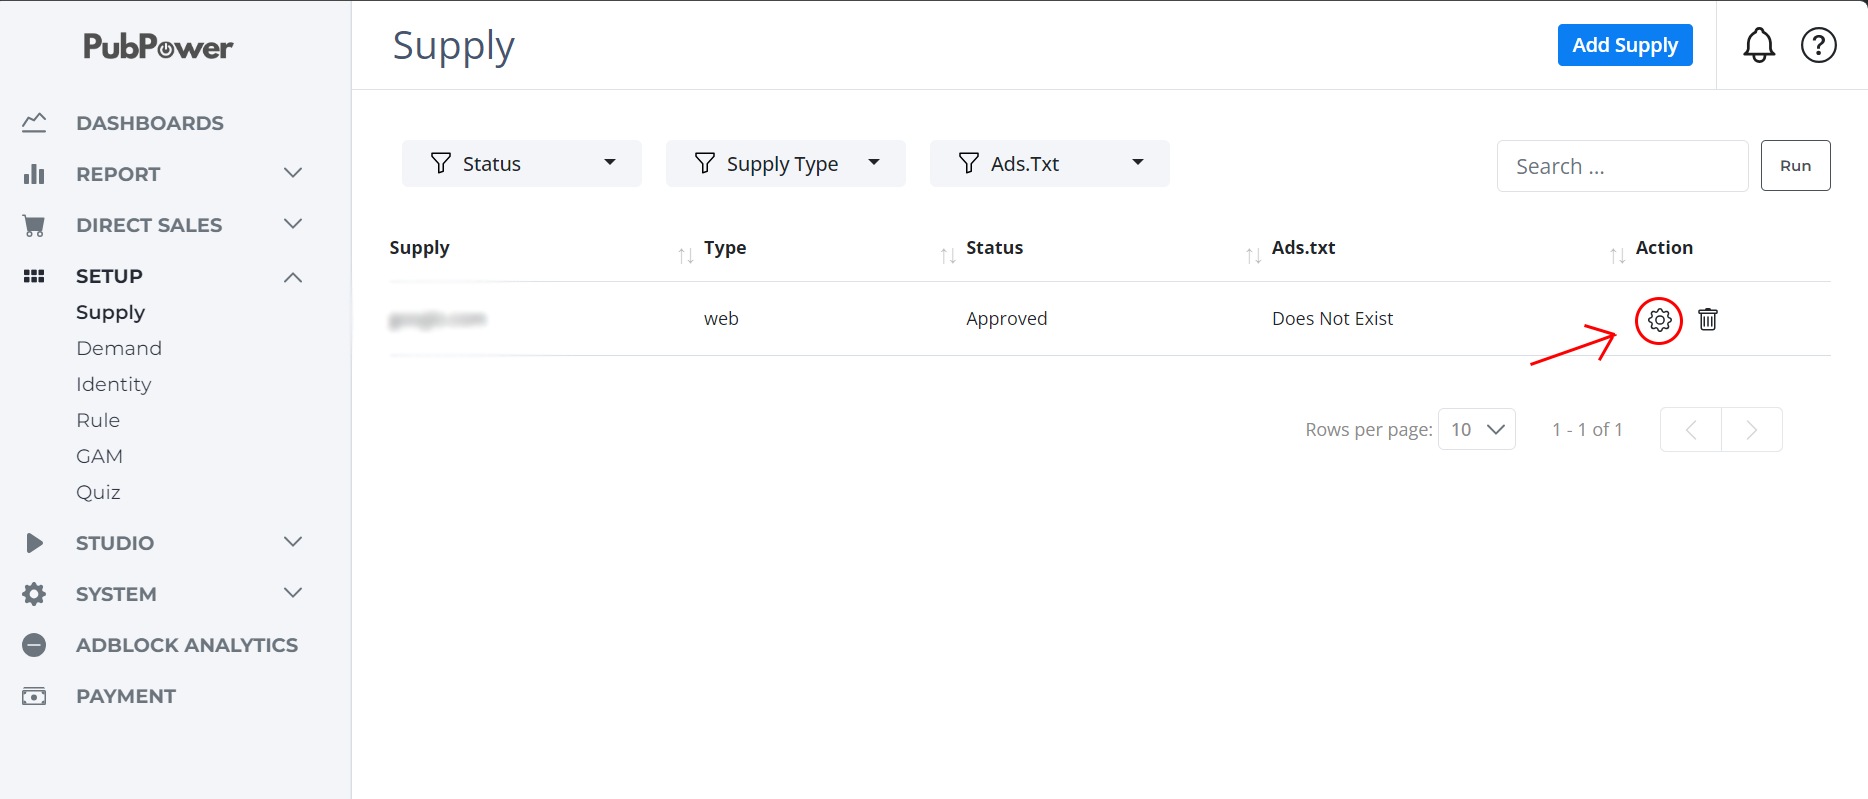
1. Again, go to SETUP -> Supply.
2. Click on the domain setup
3. In the Ad Tag section, click on New Ad Tag
4. Fill the necessary information
- Name: (You should name ad tag follow some rules so that when you look at the line item name you can see some important settings in this line item)
Example: domain.com_adtype_device_size_position
~ abc.com_display_desktop_300x250_sidebar
- Ad Type: Type of ads can be show on this ad tag
- Status: ON/OFF
- Ad Size: type of ad size
- Primary Ad Size: Choose a size that suitable with ad type
- Additional Ad Sizes:(Optional) Give more options for ad with smaller sizes
- Passback:(Optional) Put in your passback tag
5. Submit
Step 5: Add your own bidder (Optional)
PubPower allows you to add your header bidding partners to your ad stack to increase the competition through the PubPower platform.
1. Go to System > Bidder > Add Bidder.

2. Select bidder that you want to add.
3. Adjust the "Bid Adjustment" if this bidder is returning bid in gross value. If you don't know about "Bid Adjustment", you can check this article on prebid.org.
4. Add ads.txt lines for this bidder. (This is for managing ads.txt)
5. By default, we have added all the required params of each bidder. However, in some cases, if you need to use some other params, you can add it by clicking "+ Add param", enter "Param name" and select the data type including: String, Int, Float, Json, Boolean.
Please check params of all bidder on Prebid's official website at: https://docs.prebid.org/dev-docs/bidders.html
6. Click Submit.
After adding your bidder, you need to set up line items for your bidder
Step 6: Adding GAM (Optional)
Option 1: Adding your own GAM account
- Go to Setup -> GAM -> Add GAM
- Sign in and follow the process
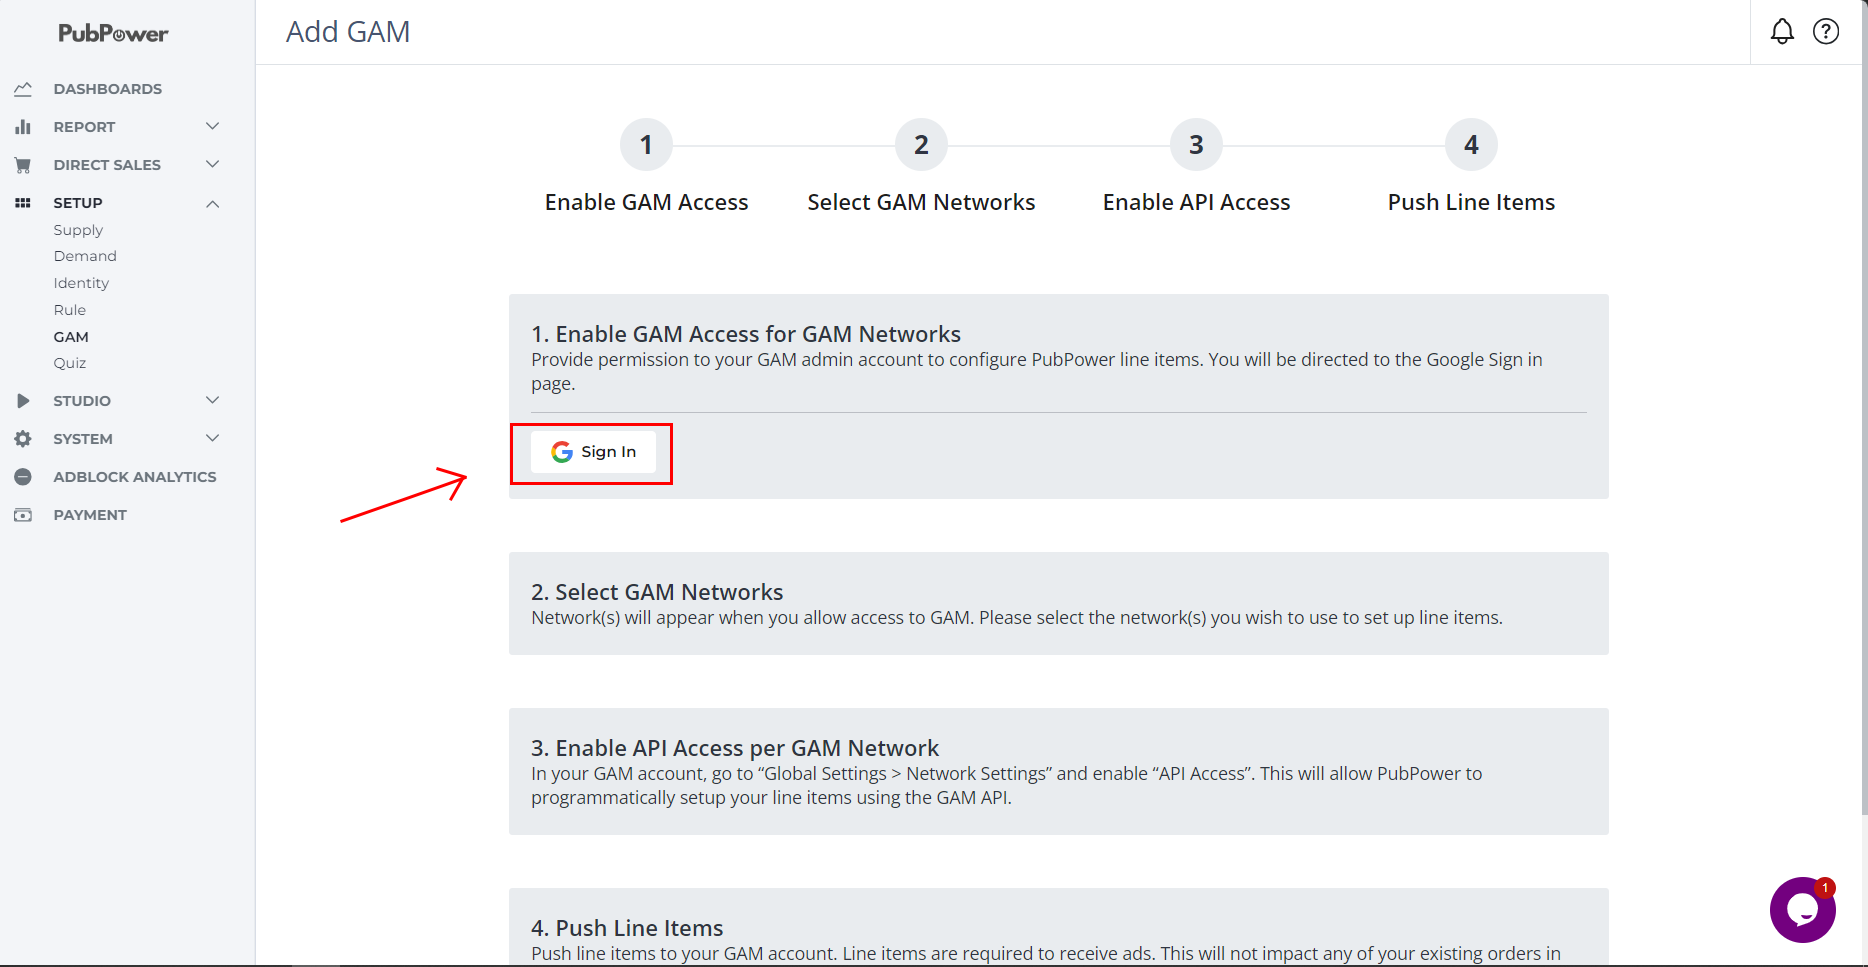
Option 2: You have AdSense but not GAM
You can sign up here: https://admanager.google.com/home/
Option 3: You have GAM and want to submit to PubPower AdX
By accepting our's GAM invitation, we as Google MCM can have the necessary information of your GAM to submit your websites to Google AdX. Because we have to manage thousand of websites at the same time, it enhances transparency and deeper insight on traffic categories, quality and validation.
You can join our GAM by following these steps:
1. Provide your GAM email address and GAM Network Code in this link and contact your account manager:
https://docs.google.com/forms/d/e/1FAIpQLSdPCeqO_c-n_Grhk4XAwo_7wrmQNI49NiHkLrrDbjZujMj9FQ/viewform
2. Check your email for PubPower GAM MCM invitation, and Accept the invitation in your GAM account like the following illustration
For additional options, please contact to your account manager for support.
Step 7: Setup line item
PubPower is designed to manage demands in line items similar Google Ad Manager.
2. Give a name for your line item. We recommend naming according to some rules so that when you look at the line item name you can see some important settings in this line item. For example:
- Ex 1: PubPower.io_Display_ROS
- Ex 2: PubPower.io_Display_300x250
- Ex 3: PubPower.io_Westminster_ROS
- Choose type: Google/Prebid
- Priority: 10 (You shouldn't change it unless there are any special cases)
- Status: ON (You can pause a line item later)
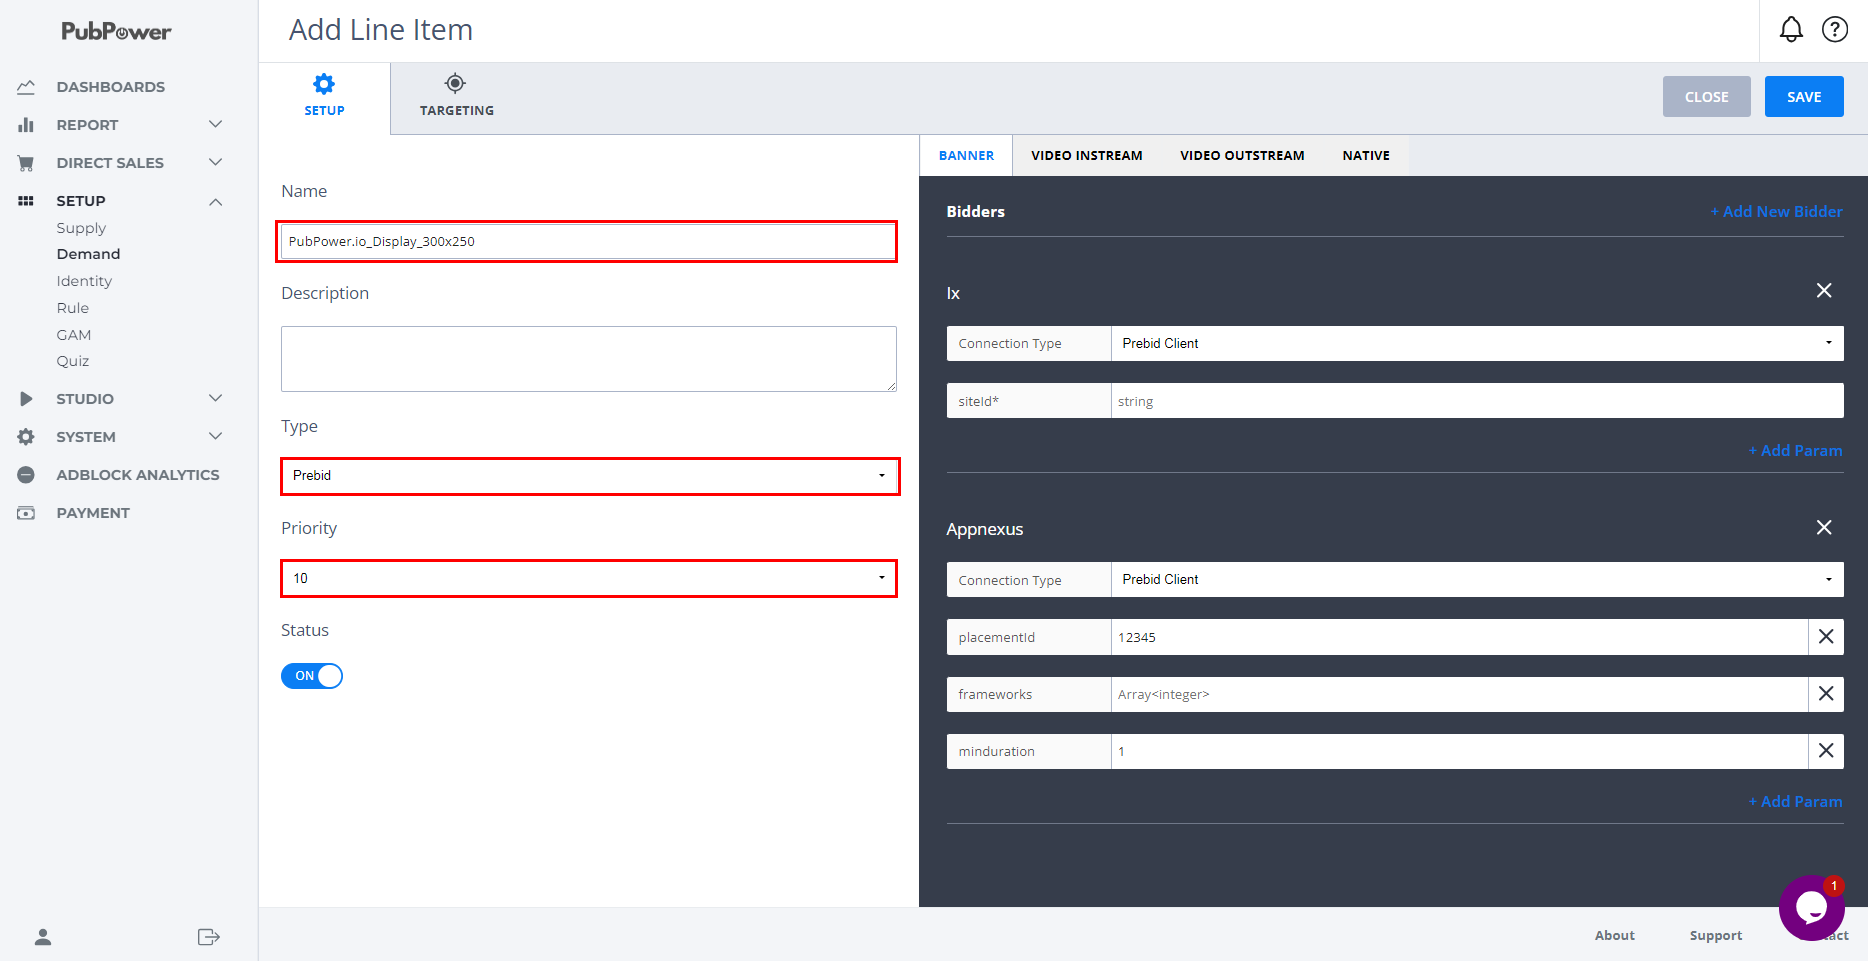
4. Setup inventory targets for demands that you plan to use in this line item. PubPower support you to target by:
- Domain
- Format
- Size
- Ad Tag
- Geography
- Device
Eg: Publisher A has a domain named example.com. He wants to use placementid = 12345 for bidder Appnexus. This placement ID only supports Display banner ad and Appnexus requires Publisher A to only send them traffic from US. In this case, Publisher A needs to setup the Targeting according to the screenshots below:

In case you choose Google, Google Ads has a fixed size, geography and device so you only have to set up:
- Domain
- Format
- Ad tag.
In AdX/Adsense Config: Choose the displayed information. In connection type, choose option that similar to ad format.
5. Add other bidders for this line up item.
6. Save
Step 8: Integrating with PubPower
Go to SETUP -> Supply -> Click on the Setup icon ⚙ on the right side of your domain.
Go to INTEGRATION section
Place the script in this bar below inside your page <head> </head> HTML to implement PubPower header bidding.

3. In the INTEGRATION section, Copy the code snippet on the ad tag, and Paste it where you want the ad to display
Step 9: Set up payment method
- Click on Account setting -> Billing section
- Choose payment method
- Fill the necessary information
- Submit
Congratulations! You've successfully kickstarted your website monetization journey with PubPower. If you encounter any confusion or require further clarification, feel free to consult our glossary.